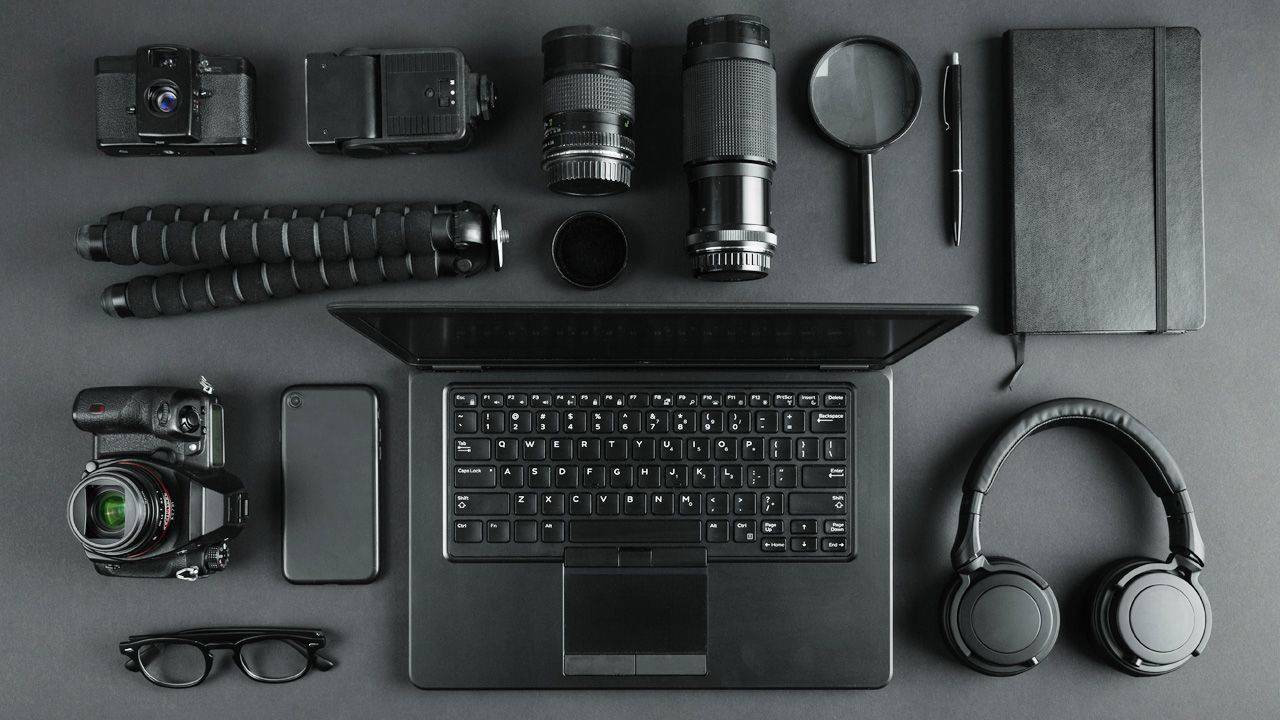
What’s in My Toolbox?
“Manners maketh the man, but gear does not maketh the photographer!” – Unknown
Quite a few people have asked me for a list of my gear. So here it is! I’ve included affiliate links for those where I have them. Using them won’t make any difference to the price you pay, but will give me a small affiliate fee that helps in providing you more content. I’ve provided my honest thoughts on each item—things I wish I had known before purchasing that will hopefully make your buying experience a bit better.
Cameras
Primary Camera: Nikon Z6II
My primary camera is the Nikon Z6II. It replaced my Nikon D750, which in turn replaced my Nikon D90.
There’s a lot of opinion on cameras and brands and which is best, but at the end of the day, all the big brands (Nikon, Canon, Fuji, Sony, Pentax, Panasonic, etc.) will give you comparable results at similar price ranges. Even the more expensive brands (Leica) will not give you a price-comparable jump in quality. You are mostly paying for the brand name and slightly better build qualities.
But there a few things to keep in mind:
- Canon is better at video, having focused on it longer than the other brands and also having a line of cinema cameras designed for filmmaking (which Nikon doesn’t have). You’ll also find other film cameras often have an option for Canon lens mounts.
- Sony is the king of low light—but the other brands are catching up. Some might argue that the Nikon mirrorless line have caught up, but I don’t think so.
- Nikon was the king of backward compatibility—a 40-year old lens still worked on my D750. My one gripe about the new Nikon mirrorless cameras is that they require an adapter to use older lenses and their adapter doesn’t have a focus engine.
If I could do it all again, I would likely start with Canon rather than Nikon. And the reason has nothing to do with photography—it has to do with lens compatibility with pro-sumer filmmaking cameras (such as the Blackmagic Cinema Cameras). But because I began with Nikon, I have a large library of lenses and compatible gear. Switching brands now is a much larger investment than if I began from scratch.
The other question a lot of people ask is DSLR vs Mirrorless. The future is mirrorless, so that is what I’m going to recommend. But for two years I had both a DSLR (Nikon D750) and mirrorless (Nikon Z6II) and I found myself using the DSLR more often. Why? A few things:
- Autofocus is snappier on the DSLR.
- The mirror shutter gives more haptic feedback.
- It’s far more intuitive to see the real world through the viewfinder
A lot of this can be attributed to experience and what I’m comfortable with. If you begin with mirrorless, you likely won’t consider any of these in your overall user experience.
Find the products here:
Secondary Camera: Fujifilm X100V
My secondary camera is the Fujifilm X100V. This camera has an analog design, but is a fixed-lens mirrorless with an APS-C sensor. This sensor is usually found in DSLR cameras, big enough for low light performance and some depth blur. I use this as my travel camera, on vacations or mild hikes.
In addition to getting nice photos, the camera looks really nice and is a great conversation starter. For street photography, you look more like a professional than if you were doing exactly the same thing using your camera phone.
Find it here - Amazon
Lenses
I have quite a few lenses, collected over the years. Lenses are an anchor that hold you to a brand. You will spend more money on lenses than you will on cameras. And once you have the glass, changing your camera brand becomes a bigger investment.
Even switching from DSLR to mirrorless, I began with the converter and then slowly added a few mirrorless lenses to my lineup.
My DSLR lenses:
- AF-S NIKKOR 28-300mm f3.5-f5.6: This replaced my kit lens (AF-S NIKKOR 24-120mm f4) and is what resides on my camera 80% of the time. It’s got an amazing range and looks good throughout the range. If I could have only one lens, this would be it. I’ve done entire portrait shoots with just this lens.
- AF NIKKOR 50mm f1.8: My go-to lens for general indoor or night time photography. The large f-stop allows for shallow depth of field and low light photography.
- AF NIKKOR 85mm f1.8: I use this primarily for low-light or natural light portraits. Also for portraits where I want shallow depth of field.
- AF NIKKOR 28mm f2.8: Obviously not as large an f-stop as the 50mm and 85mm, but still better than what you get with zoom lenses. I use this lens mostly for street photography.
I also have a Rokinon 14mm 2.8 lens and a Nikkor 80-200mm 2.8 lens. I don’t use either one that often. 14mm is almost fish-eye and not that useful except in very specific situations. And the 80-200 range I have covered with my primary zoom lens (the 28-300).
Find the lenses here:
- AF-S NIKKOR 28-300mm f3.5-f5.6 - Amazon
- AF NIKKOR 50mm f1.8 - Amazon
- AF NIKKOR 85mm f1.8 - Amazon
- AF NIKKOR 28mm f2.8 - Amazon
- Rokinon 14mm 2.8 lens - Amazon
- Nikkor 80-200mm 2.8 lens - Amazon
Mirrorless Lenses
Since acquiring the Nikon Z6II, I’ve added three mirrorless lenses to my lineup, in addition to the adapter (which allows me to use all of the above lenses with my mirrorless camera).
- Nikkor Z 24-120mm f4 S: This is my “carry around” lens, covering the primary shooting range for family, vacation, landscape and portrait photography.
- Nikkor Z 35mm f1.8 S: I don’t use this lens enough to justify my purchase of it. It’s good for street photography, especially night photography. But 50mm is a very similar zoom and the one I use more often.
- Nikkor Z 50mm f1.8 S: This is the lens I use for all my videos. And it’s my preferred lens for street and night photography.
Find the lenses here:
Drone
Mavic Air 2 - I use the Mavic Air 2 and am quite happy with it. The camera quality is about what you would get with a high-end smartphone, but it does give you RAW files and can record 4k video. The drone itself has obstacle avoidance in the front, back, top and bottom. It doesn’t have obstacle avoidance on the sides—which I found out the hard way. If you do get a drone, I recommend buying the DJI Care Plan. It will allow you to get your drone replaced for a small fee if you damage it.
Find the drone here:
Mavic Air 2 Fly More kit - Amazon
Lighting
Most of my lighting gear is from Godox, a relatively cheap Chinese brand that makes a versatile line of lighting products that work well together. I’m very comfortable doing post processing, so the slight differences in light quality between the affordable brand and the high end brand makes little difference to me. I’ve used both and the things that matter most to me when it comes to lighting are:
- How easy is it to control the amount of light?
- How hassle-free is the triggering?
- For strobes, how fast can the light fire again?
Godox lights do all three well enough for my needs.
Here’s the equipment I use:
- Godox V860II - This is a hi-speed flash with a rechargeable battery that works with the Godox trigger or on the flash shoe of your camera. Most flashes won’t work above 1/200’s of a second due to the shutter design in DSLR cameras. A hi-speed flash works around this, giving you the ability to sync at shutter speeds as high as 1/4000s of a second. This is important when you want to stop motion or use the flash against the sun.
- 2x Godox SK400II - I’ve got two of these. They are strobe lights that require wall power and are triggered either by another flash or by the Godox trigger. They’re adjustable through a knob on the lights or through the trigger. They have a bowens mount for softboxes or other accessories. Their recycle time (how long it takes before it can fire again) is consistently less than 1 second. For the price, these are great. But they are relatively cheap and this is reflected in the construction.
- Godox Xpro-N TTL Wireless Flash Trigger - This is a trigger. It goes on your flash shoe and tells either the strobe lights or the flash when to fire. You can also control the intensity of the light from the trigger, which is very convenient when shooting. The trigger works without any modification or custom set up on both my DSLR and mirrorless cameras.
Even though Godox is an affordable brand, there are even cheaper brands on Amazon. I’ve tried quite a few and would recommend staying away from them. They will fall apart or stop working often enough that paying slightly more will always save you money in the end.
For the strobe lights, I currently have two softboxes:
- Godox 12"x47" rectangular softbox
- Neewer 28” Deep Parabolic Softbox
For backdrops, I use a cheap stand by EMART. I’ve used it now for 5 years and it’s held up really well, except for the zipper on the carry case. The paper rolls I purchase at Samy’s Camera, where I can get a 3’x36’ roll for less than $40. My most used roll is a neutral grey that I bought 5 years ago. It will last me another 5 years.
Find gear here:
- Godox V860II - Amazon
- Godox SK400II - Amazon
- Godox Xpro-N TTL Wireless Flash Trigger - Amazon
- Godox 12"x47" rectangular softbox - Amazon
- 28” Deep Parabolic Softbox (equivalent) - Amazon
Tripod
I have a small collection of tripods:
Benro Adventure 2 Series Aluminum Tripod with the Benro IB2 head - This is my primary tripod and it does it’s job well. It’s too clunky for long hikes and takes up a lot of space when traveling, so you’ll probably need a companion travel tripod as well.
Odwarf Q08 Tripod head on SPRINT MINI III Legs - This is my companion travel tripod and fits on the side of my camera backpack. It’s small enough to take on a hike, but still big enough to stably mount a large DSLR or mirrorless camera. I bought the kit lens from Silk and then replaced the head with one that uses an Arca Swiss mount. I try to standardize this across my stabilization gear so that I can easily move my camera from mount to mount without having to change plates.
Benro A48FD Aluminum Monopod with 3-Leg Base & S4Pro Fluid Video - I interchange the head on this with the head on my Adventure tripod. As both are Benro, they smoothly switch. I use this when I need a monopod—i.e., some stabilization needed, but not enough to justify the hampered speed of using a tripod.
Manfrotto 502 Video Head - This is a fluid-head for video. Not great for photography as it doesn’t allow you to turn the camera to portrait. Does a really good job for video where you want smooth movement. You can also control the drag for slow pans and tilts.
Joby Gorillapod Focus - This is my least used tripod. It’s a cool gimmick—you can wrap it around anything and adjust it to whatever your environment is. But in the real world, a normal tripod will work for 95% of all your shooting needs.
Slik Mini Pro III Tripod with Ball Head - This is my travel mini tripod. It fits inside my camera bag and I can take it anywhere. That said, it’s definitely a mini tripod and will only lift your camera about 8” off the ground.
I also have a clamp tripod and a suction cup tripod and a tripod for my GoPro, but these are all too specialty to list.
Find the tripods here:
- Benro Adventure 2 - Amazon
- SPRINT MINI III Legs - Amazon
- Arca Swiss Ball head (equivalent) - Amazon
- Benro Monopod S4Pro Fluid Video - Amazon
- Manfrotto 502 Video Head - Amazon
- Joby Gorillapod Focus - Amazon
- Slik Mini Pro III Tripod with Ball Head - Amazon
Recording Setup
As I do more video tutorials, I’ve upgraded my recording setup over time, with the primary purpose of making the process from recording to publishing as fast as possible while also increasing the quality of presentation for my audience.
Here’s the gear that I use for recording:
Shure SM7B - This is the microphone I use for recording. This is considered one of the industry standard mics for podcast recording. Shure have recently released a USB version of this same mic, which would obviate a few of the other items on this list. But I haven’t tried it so can’t really recommend it.
Fethead Preamp - If you’re going to use the SM7B, you’ll need either a Fethead preamp or a Cloudlifter. Both do the same thing—amplify the signal from the microphone before it goes into your recording device. Note here that Fethead also sells a Fethead Phantom—this one has a different purpose and will NOT work with the SM7B. I made the mistake of buying this one first.
iTrack Solo by Focusrite - This is an audio interface that takes the XLR inputs from your microphone and feeds the audio through USB to your computer. It has a gain control as well as a microphone out jack for monitoring your sound.
Note that if you buy the Shure MV7 USB Podcast Microphone instead of the SM7B, you can skip buying the fethead and the iTrack Solo as this all happens inside of the microphone, which then feeds straight to your computer.
2x Key Lights by Elgato - These are LED Panel video lights with wifi that you can control from an interface on your computer. The lights come with desk clamps and stands for easy set up and are designed for recording talking head or “in front of a computer” videos (think video game streamers). I have these permanently set up on my desk and can turn them on or off from my computer or phone, which is very handy. My one gripe is that I can’t control them with Alexa.
Key Light Air by Elgato - This is the desktop mini version of the light above. I use this for zoom calls or meetups where I’m talking to my computer. It also acts as a side light when I record my other videos.
Cam Link 4K - This is a device that takes the HDMI signal from my Nikon Z6II camera and feeds it into my computer as a USB signal. With this, I can use my DSLR camera as a WebCam, making the video production process a lot easier for me to control from behind my computer.
Find the gear here:
- Shure SM7B - Amazon
- Fethead Preamp - Amazon
- iTrack Solo by Focusrite - Amazon
- Key Lights by Elgato - Amazon
- Key Light Air by Elgato - Amazon
- Cam Link 4K - Amazon
Computer Setup
iMac (Retina 5K, 27-inch, 2020) - I’ve worked for years on PC and for years on a MAC. I prefer Mac but the software I use runs on both and with today’s computers, there’s not much difference between comparable mac and pc desktop computers. But I’m already invested in the Apple infrastructure so I’m sticking with mac.
This computer is starting to run a bit slow. When Apple releases their next iteration of the Mac Studio, I’ll likely upgrade.
ASUS 23.8” 144Hz FreeSync Gaming Monitor - If you’re doing graphic design as a profession, having a second monitor is a must. When recording tutorials, I keep all my reference material (script, final composite, notes, etc.) on the second monitor. And when designing for clients, I can use the second monitor for my panels, giving me more real estate for the design. I got this one specifically because I wanted one that I could put into horizontal mode, in case I wanted to record tutorials for reels or stories.
OWC Mercury Elite Pro Dual - This is a 6TB raid that I use for all my storage. It has two drives that are constantly mirroring each other. If one drive fails, the information isn’t lost.
Wacom Intuos Medium tablet - A drawing tablet is an essential tool for Photoshop and a must if you are doing a lot of digital painting. I’ve tried a few brands and they’re all terrible compared to Wacom—who own a patent on the battery-free pen. Don’t waste your money on other brands. If you are on a tight budget, just get the cheapest one Wacom offers or get a used one. I’ve been using the same Wacom tablet for 10 years. My one recommendation here is to get the medium size. With the large one, your wrist will start to get tired really fast. And with the small one, the pen is as sensitive as the mouse, making it almost useless.
I’ll note here that I have also used the Wacom displays and I’m not a fan. I like to see the whole image as I’m drawing. And by the time you’re ready to buy one you’ll have already trained your brain to associate your hand movement with the mouse movement.
Logitech G502 Hero Mouse - I can’t stand Apple’s Magic Mouse. It’s not ergonomic and the latest version can’t even be used when charging. The mouse I use is the G502 (I previously used the G500 S, but it was discontinued). It’s a very accurate gaming mouse with a middle wheel. It is very comfortable to hold and most importantly—it’s weighted. This helps a lot when using photoshop. Your movement is smoother and more intentional. The mouse also has 5 additional programmable buttons that you can put to use for whatever you want (play/pause music, switching apps, etc.).
Apple keyboard with numberpad - If you’re a graphic designer, you need a number pad. Make sure you get a keyboard that has one.
MacBook Air Laptop (13”, 2015) - In addition to the iMac, I also have a laptop. It’s small enough to take with me on shoots or when traveling and has an SD card reader built in. It’s annoying Apple got rid of this in the new version. This one is going on 8 years old and is definitely one that I’ll be replacing soon.
Find the important gear here:
- Mac Studio - Apple
- Side Monitor - Amazon
- Raid (external memory) - Amazon
- Wacom Tablet - Amazon
- Precision Gaming Mouse - Amazon
- Apple Keyboard with numberpad - Apple
- MacBook Air - Apple
Software
Photoshop - The industry-standard image editing software. If you’re going to make graphic design or photo compositing your profession, you need to learn photoshop. Simple as that. I have both the latest release and the beta installed on my computer. While I have the Creative Cloud All App membership plan, if you’re just looking for Photoshop, I recommend the Photography plan, which includes Photoshop, Lightroom and 1TB of cloud storage. (Save this space for your libraries—keep your documents stored locally.)
Lightroom - All my photographs go into Lightroom first. Lightroom is a photo cataloging software with a very capable RAW photo editor (the same engine used by Photoshop’s Camera RAW filter). I was late to adopt Lightroom, not seeing the need for it when I could do everything just as fast and with more capabilities in Photoshop. I don’t feel that way anymore.
Optics by BorisFX - This software can be used as a plugin for Photoshop or as a standalone software. It’s similar to the Filter Gallery in Photoshop in that your image is opened in its own dialogue/workspace where you can stack different filters on top of each other. I use it as a plugin for Photoshop and primarily use the tools that add visual effects not otherwise possible in Photoshop. Lightning, lens flares, light leaks, grunge, moons—all can be realistically generated with Optics.
Adobe Creative Cloud - As mentioned above, I have the full Adobe creative cloud subscription and use the following other programs regularly:
- InDesign - for multi-page document layout and typesetting
- Illustrator - for vector-based design and layout
- After Effects - for motion graphics and visual effects
- Premiere - for video editing
Screenflow - This is a screen capture software I use for recording my tutorials and professional training courses. It has great tools designed with content creators in mind—basic editing, showing keyboard shortcuts, insetting videos, etc.
Modo - This is a 3D software program. I used 3DS Max previously but unfortunately it’s a PC-only software and the learning curve on Maya wasn’t worth it for how little I do 3D. At the time of purchase, Modo was under $500 and had all of the same modeling and render tools as 3DS Max. It was far behind on animation, but I wasn’t doing animation. It has since done a lot to catch up with its larger competitors, which has also brought the price up to almost 2k.
Find the software here:
- Adobe Photography Plan - Adobe
- Full Creative Cloud - Adobe
- Optics for Photoshop - BorisFX
- Screenflow - Telestream
- Modo - Foundry
Camera Bag
I’ll make a quick mention here of my camera bag and strap. Both are pretty important pieces of gear for any photographer.
Think Tank Retrospective 7 V2.0 - This is my primary camera bag. It fits my camera (with the 28-300 lens) plus two additional lenses, my laptop, my travel tripod or flash, with additional space for batteries, cards and other smaller items. Since I got it, this has become my go-to travel bag.
Lowepro Transit Backpack 350 - This is my travel camera backpack. It carries everything the Restrospective carries plus another two lenses or an additional camera body. It can also carry both the travel tripod and flash at the same time. If I’m flying or going somewhere where I want the majority of my gear to come with me, I use this backpack.
Peak Design Slide - This is a camera strap that works both as a neck strap and as a shoulder strap. It also features a quick release on both ends, so if you’re mounting the camera on a tripod, you can quickly take the strap off. After using this strap, I don’t see myself ever going back to the Nikon strap that shipped with my camera. When I lost this strap, I immediately replaced it with the same strap.
Find the bags here:
- Think Tank Retrospective 7 V2.0 - Amazon
- Transit Backpack (equivalent) - Amazon
- Peak Design Slide - Amazon
I think that completes the list! And hopefully helps at least a few people make their buying decisions.