Rediscover Creativity Through Texture and Technique
Bring Analog Charm into Your Digital Art
The Paper Collage Creative Project is unlike any other Photoshop course. Instead of starting on a screen, you’ll begin with scissors, glue, and old magazines—creating tactile textures that are later transformed into a fully digital, stylized image.
Follow step by step as you design your own collage papers, digitize them, and build a professional Photoshop composite from scratch. You’ll learn how to convert your handmade elements into seamless patterns, stylize a subject with tonal mapping, and layer textures using Blend If and advanced masking—resulting in an image that’s entirely yours, yet guided by the workflow of a seasoned pro.
$37
(Includes All Project Files + Bonus Textures)
Purchase the CoursePaper Collage Creative Project
Create a Handcrafted Photoshop Composite Step-by-Step

Master the Art of Textured Composites
Unleash Your Creativity with a Hands-On, Professional Workflow
Step into a truly unique creative process with the Paper Collage Creative Project—where handmade textures meet pro-level Photoshop techniques. In this expressive, step-by-step course, you’ll start off-screen with scissors and glue, creating physical collage papers that are later scanned, stylized, and transformed into a layered digital artwork.
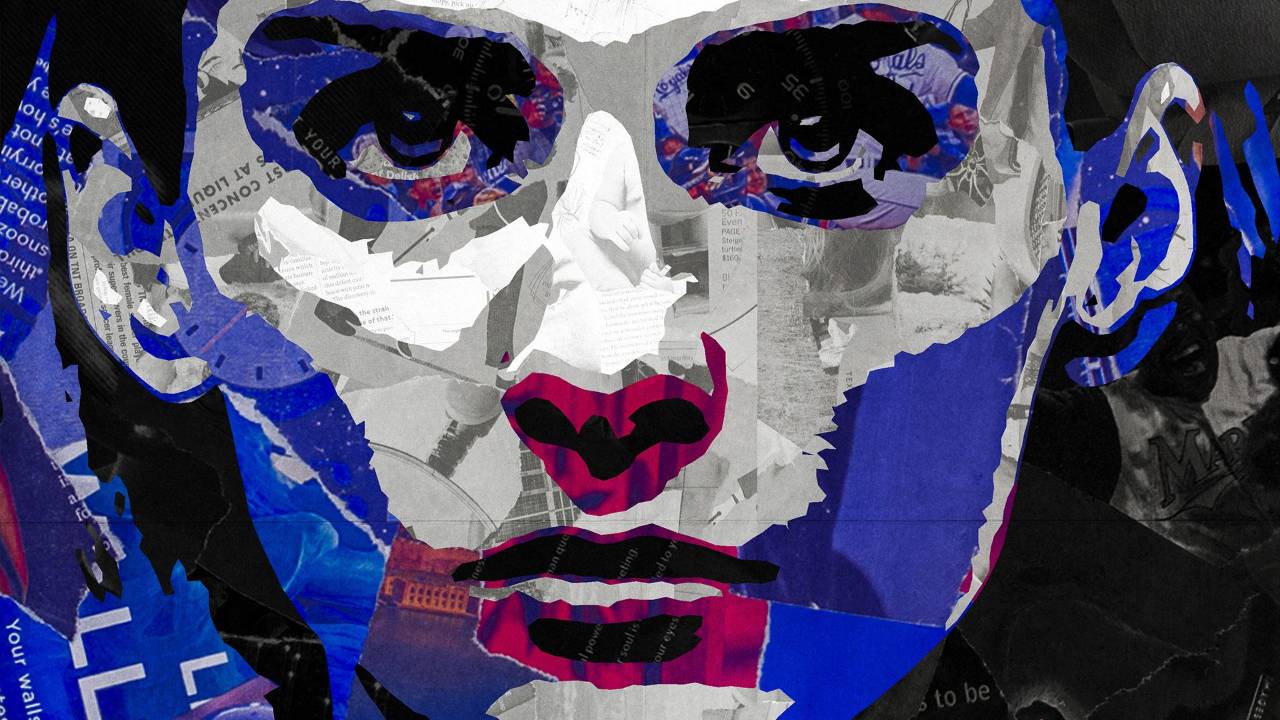
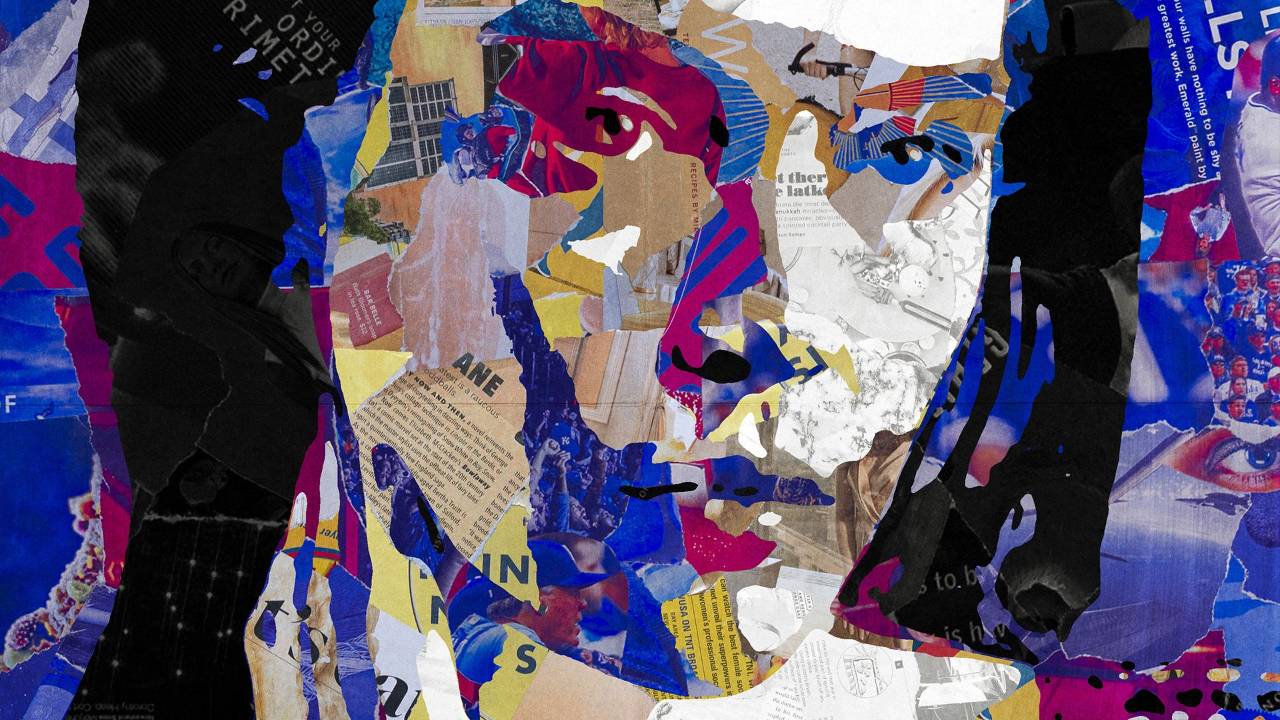
You’ll build your own version of the Statue of Liberty using custom paper patterns, tonal mapping, advanced blending techniques, and a reusable smart template—all while learning how to bring your personal style into Photoshop like never before. Whether you're just beginning your creative journey or looking to rediscover it, this project is unlike anything you’ve done before.
$37
(Includes 25 Bonus Assets: Patterns, Overlays, and Project Files)
Purchase the Course NowLESSONS
18
LENGTH
2h 28m
SOFTWARE
PS 2025
Bringing Your Creative Vision to Life
Where Handmade Texture Meets Professional Technique
The Paper Collage Creative Project is your chance to create something that looks and feels truly original. You’ll start by crafting physical collage textures using paper, glue, and scissors—then digitize them and bring them into Photoshop to build a stylized composite from the ground up.
Through this project, you'll master tonal mapping, precision masking, custom patterns, and professional blending techniques—all while working with assets you’ve created yourself. Whether you're new to compositing or looking to refresh your creative process, this course will reconnect you with the tactile joy of making and teach you how to bring that authenticity into your digital work.
SETTING THE STAGE
Laying the Foundation with Scissors, Glue, and Texture
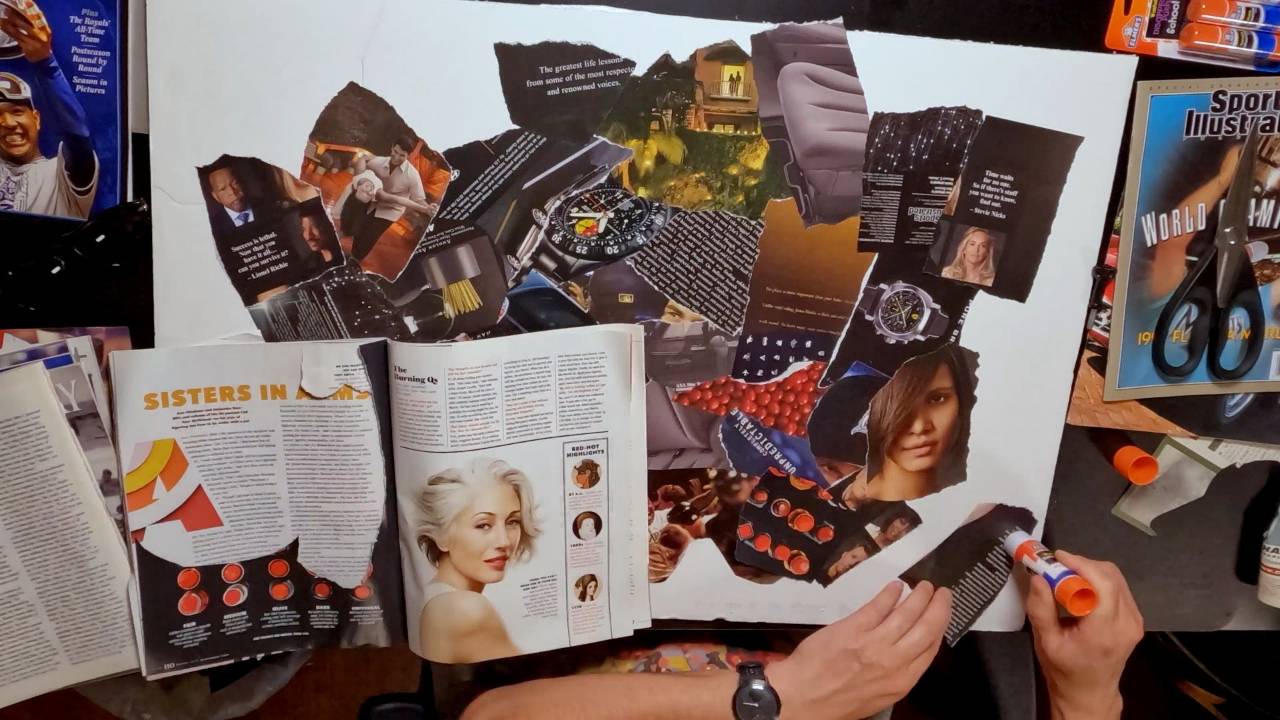
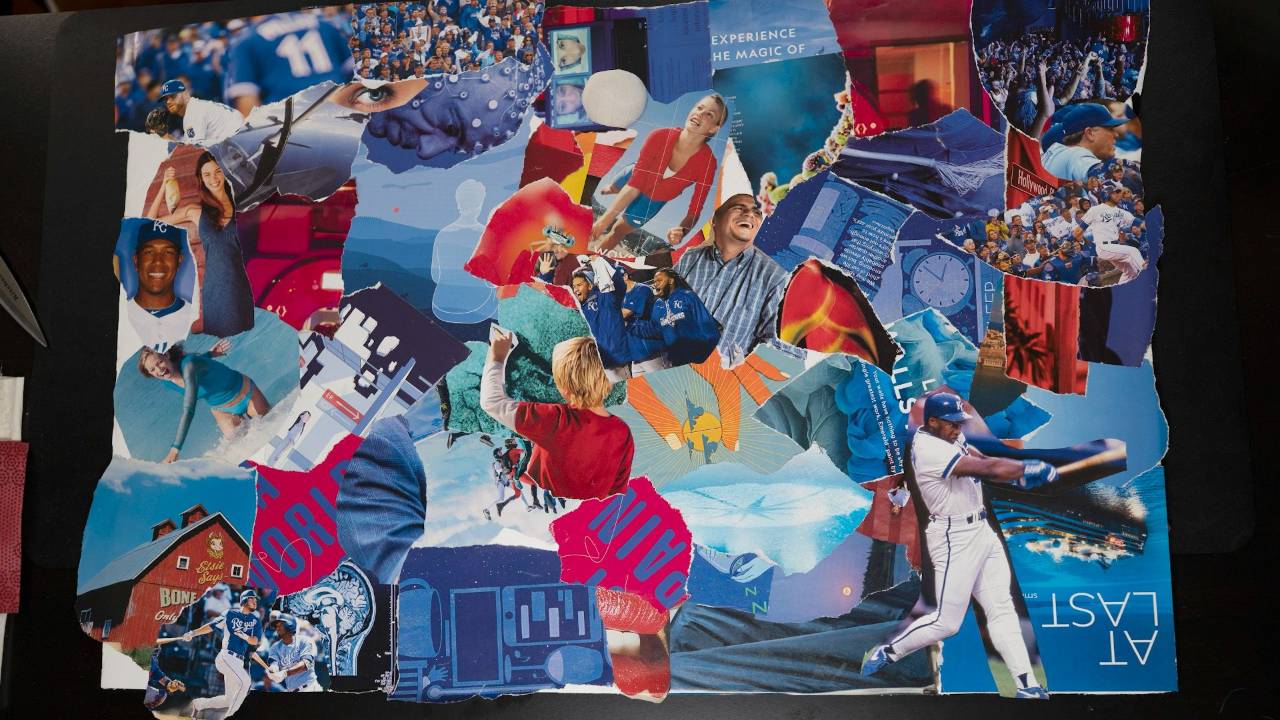
Every great image starts with a strong foundation—but in this course, that foundation begins off-screen. You’ll start by creating handmade paper collages using scissors, glue, and found materials.
These become your personal texture library—built with intention, color harmony, and tonal variation in mind. From there, you'll learn how to digitize your collages with consistent lighting and composition, preparing them to become seamless textures inside Photoshop. This section reconnects you with the tactile joy of making and sets the stage for a digital project rooted in authenticity and creative intent.
Buy Now
BUILDING THE TEXTURE LIBRARY
Transforming Paper Collages into Seamless Digital Patterns
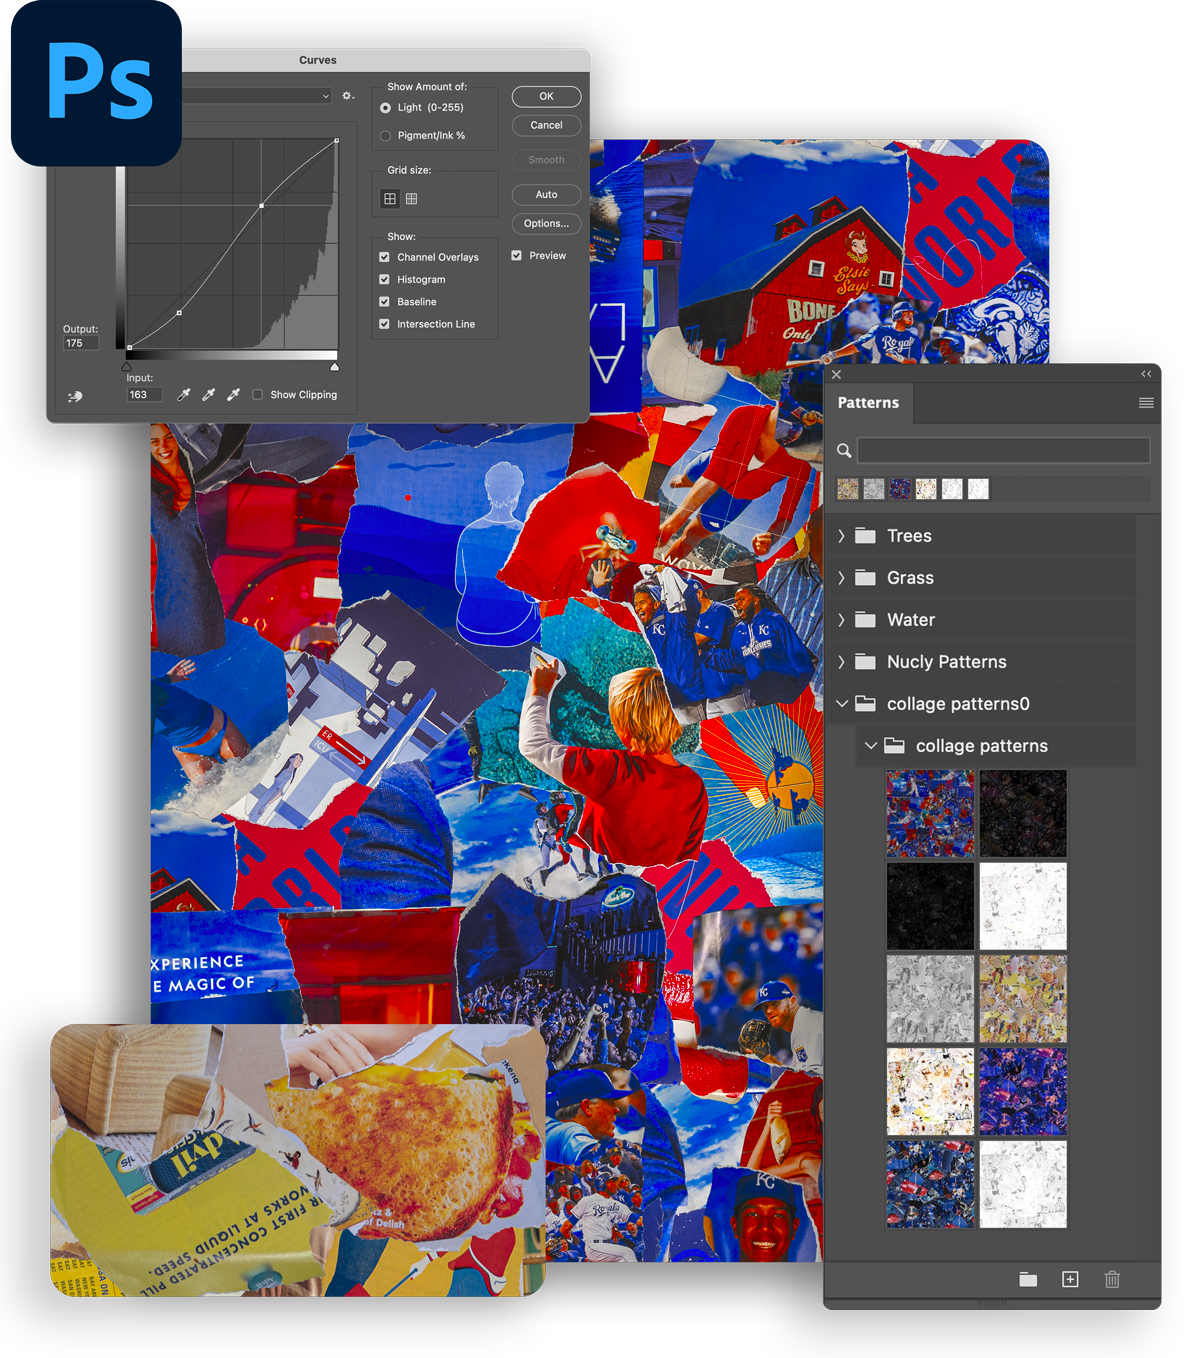
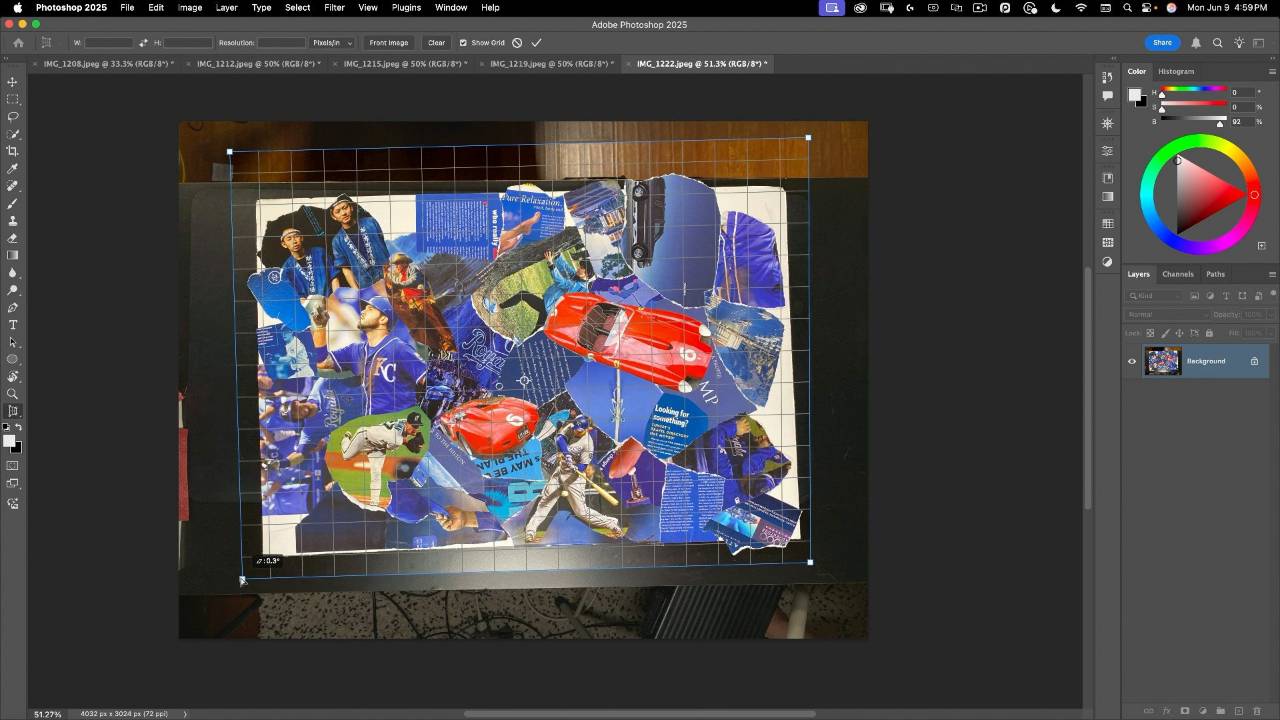
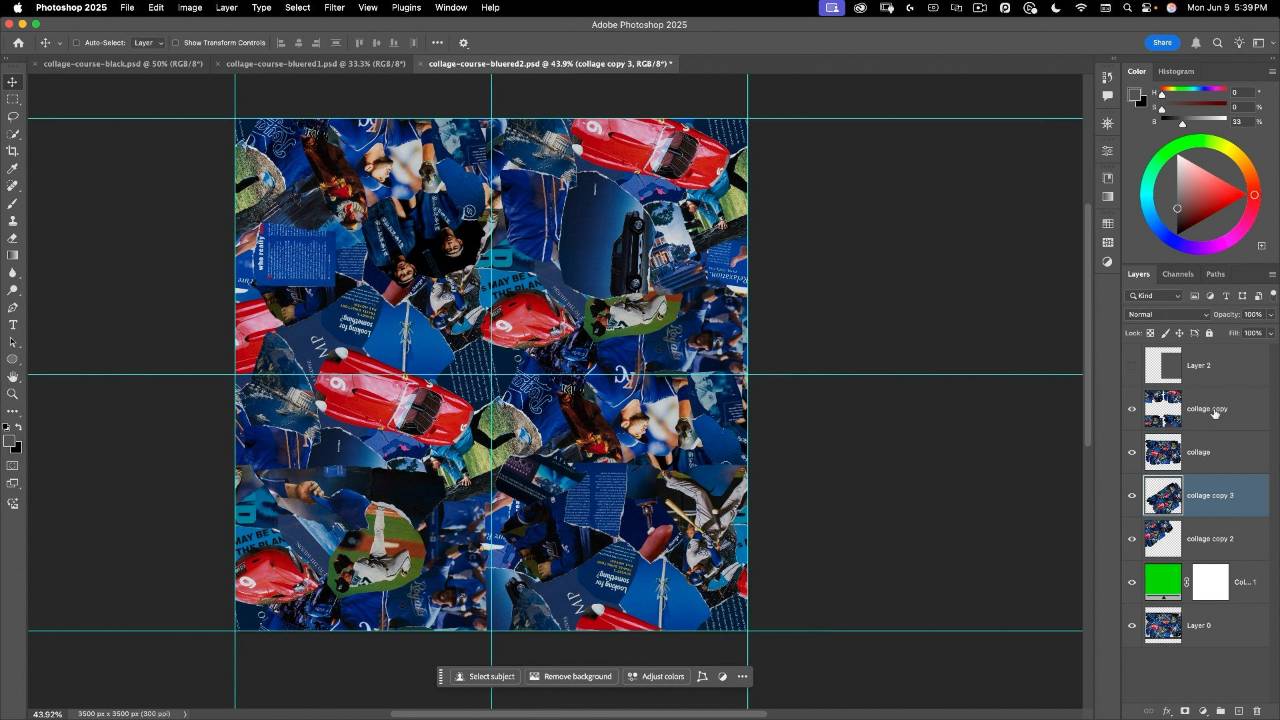
With your analog textures captured, it’s time to bring them into Photoshop and turn them into fully functional digital assets. In this section, you’ll learn how to clean up your scans, mask backgrounds, adjust tone and color, and convert each collage into seamless high-resolution patterns. You'll explore techniques like the Offset filter, Crystallize, posterization, grayscale balancing, and pattern definition. These steps form the core of your digital toolbox—giving you textures that not only look hand-crafted, but behave like pro-level design elements.
Buy NowCREATING THE TEMPLATE
Design Once.
Reuse Forever.
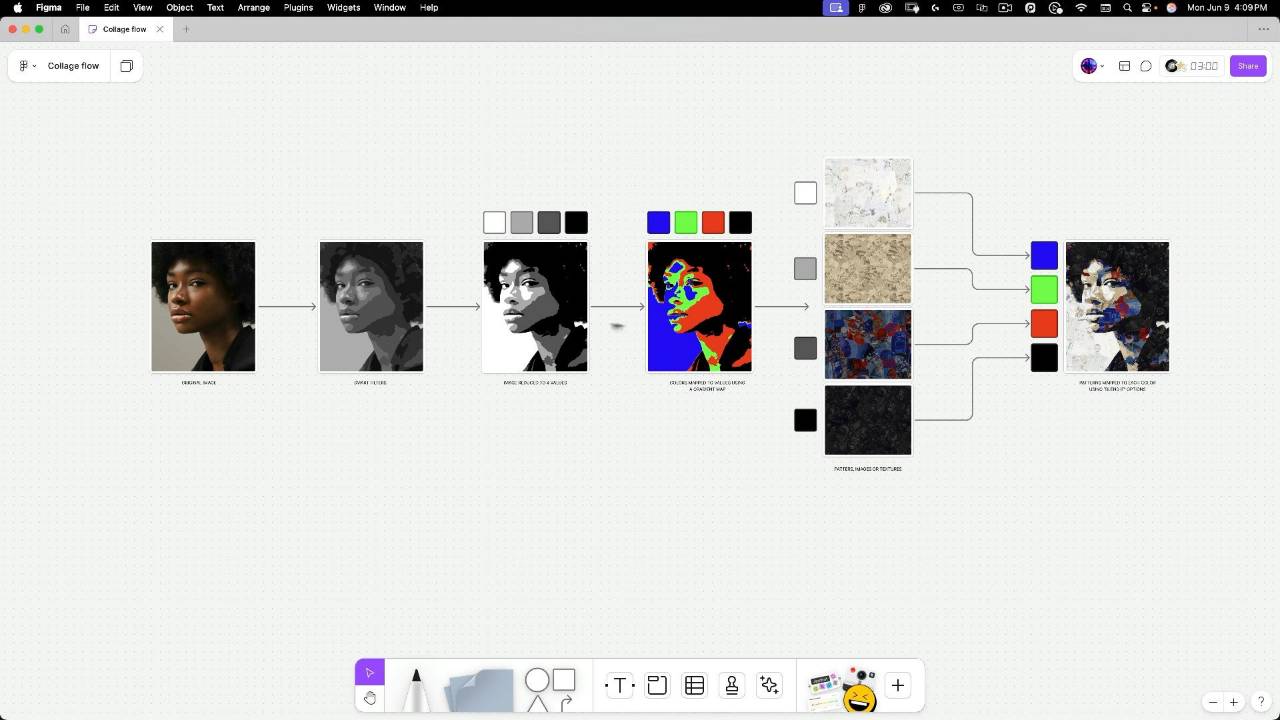
With your textures ready, you’ll now build a smart, reusable Photoshop template that transforms any photo into a cut-paper collage. Using tonal mapping, gradient maps, and Blend If controls, you'll assign each collage pattern to a tonal zone—white, highlight, shadow, and black—creating a stylized composite that mimics traditional paper art. Once the system is in place, you can swap in any new image and instantly apply the effect. Whether it’s a portrait, landmark, or vintage photo, your final template turns a one-time project into a repeatable creative engine.
Buy Now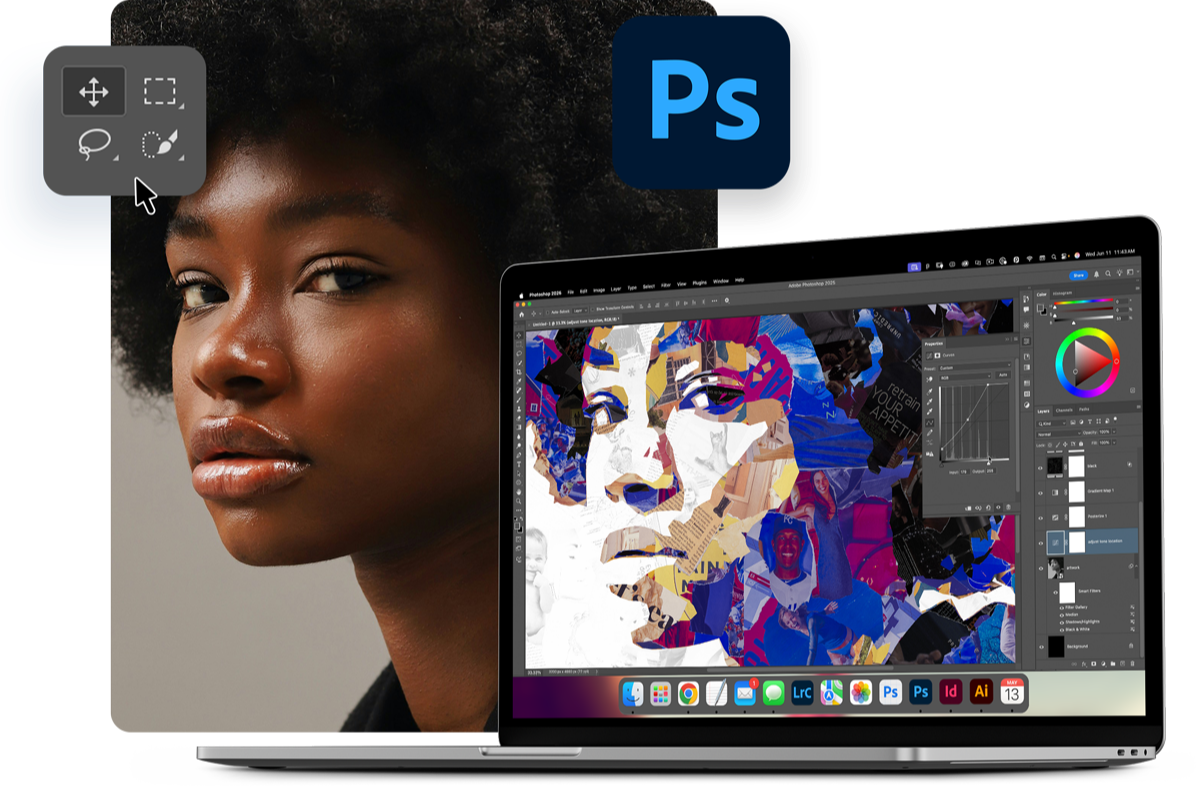

MEET YOUR INSTRUCTOR
Rikard Rodin, Instructor
Rikard is an experienced creative professional with a background in graphic design, web and interactive media, 3D modeling, and motion graphics. He has worked with clients including SEGA, Virgin Unite, and Riot Games, producing everything from album and book covers to full print campaigns and theatrical posters. His work has been translated into multiple languages and recognized with numerous design awards.
Beyond his professional projects, Rikard is also a passionate educator. His Photoshop tutorials and design blog have helped hundreds of thousands of artists and designers level up their skills. His writing has been featured in international design magazines, and he has guest-lectured on color theory at Chapman University.
On a more personal note, Rikard is a father of twin girls, an avid photographer, and a lover of woodworking. His mission through Nucly is to help creatives bring their imagination to life—and to make Photoshop not just accessible, but fun.
The Art of Textural Compositing
Step into a new kind of creative process—one that begins with paper, glue, and your imagination. In the Paper Collage Creative Project, you’ll explore how Photoshop can bring handcrafted textures to life, transforming them into a stylized digital artwork built entirely from your own materials.
Imagine turning torn pages and magazine scraps into layered, expressive images that feel both analog and modern. Whether you're a designer looking to reconnect with creativity or an artist ready for something truly personal, this course will show you how to build a collage composite that reflects your unique eye and style.
Join us and unlock the freedom to blend tactile craft with digital precision—where every texture tells a story, and every detail is yours.
$37
(Includes 25 Bonus Assets: Patterns, Overlays, and Project Files)
Purchase the Course
100% 30-Day Money-Back Guarantee
We know there are many ways you could spend your time and money when learning Photoshop—and we’re honored you’ve chosen Nucly. That’s why every course comes with a 30-day satisfaction guarantee. If the Paper Collage Creative Project doesn’t meet your expectations, and our support team can’t make it right, you’ll receive a full refund. No questions asked.
Frequently Asked Questions
Does the course come with Photoshop?
What version of Photoshop does this use?
Can I do the course with an older version of Photoshop?
How will I get the course?
What if I run into trouble during the course?
Is this course part of the Nucly Academy?
Handmade Texture, Digital Control
In the Paper Collage Creative Project, creativity starts off-screen—with your hands, your materials, and your intuition. This course shows you how to blend tactile, analog textures with the full power of Photoshop—giving you a process that’s both deeply personal and professionally polished.
From crafting and scanning your own collage materials to turning them into seamless digital patterns, you’ll discover how to bridge two worlds: the unpredictable beauty of paper and the precision of Photoshop. You'll use smart objects, tonal mapping, and advanced blending tools to build a stylized composite that couldn’t be made any other way.
This isn’t about automation—it’s about reclaiming creativity. You’ll walk away with a custom template, a library of your own patterns, and a finished image that feels handmade because it is. With this course, you get the best of both worlds: analog soul with digital power.
$37
LET'S GET STARTED
THIS COURSE IS INCLUDED IN THE NUCLY ALL-ACCESS ACADEMY
Save 85% when you sign up for our brand-new ALL ACCESS Nucly Academy. With the Academy, you get all of my professional training, 2,500+ Photoshop assets and presets plus our exclusive community.
Take a sneak peak inside...

Module 1:
Introduction
This module introduces the course and sets the stage for a creative journey that starts off-screen. You’ll gather your materials—magazines, glue, foam core—and learn how to source, sort, and prep textures that will become the foundation of your final digital collage.
Module 2:
Tips for Paper Collage
Get hands-on guidance for building your physical collages. You’ll learn what textures work best, how to group by tone, and how to plan your boards to match shadows, midtones, highlights, and whites in your final composite.
Module 3:
Creating the Paper Collages
Now it’s time to build. Using your collected materials, you’ll create 3–5 paper collage boards—each with a distinct tonal purpose. These will become the raw materials for your digital project.
Module 4:
Photographing Your Collages
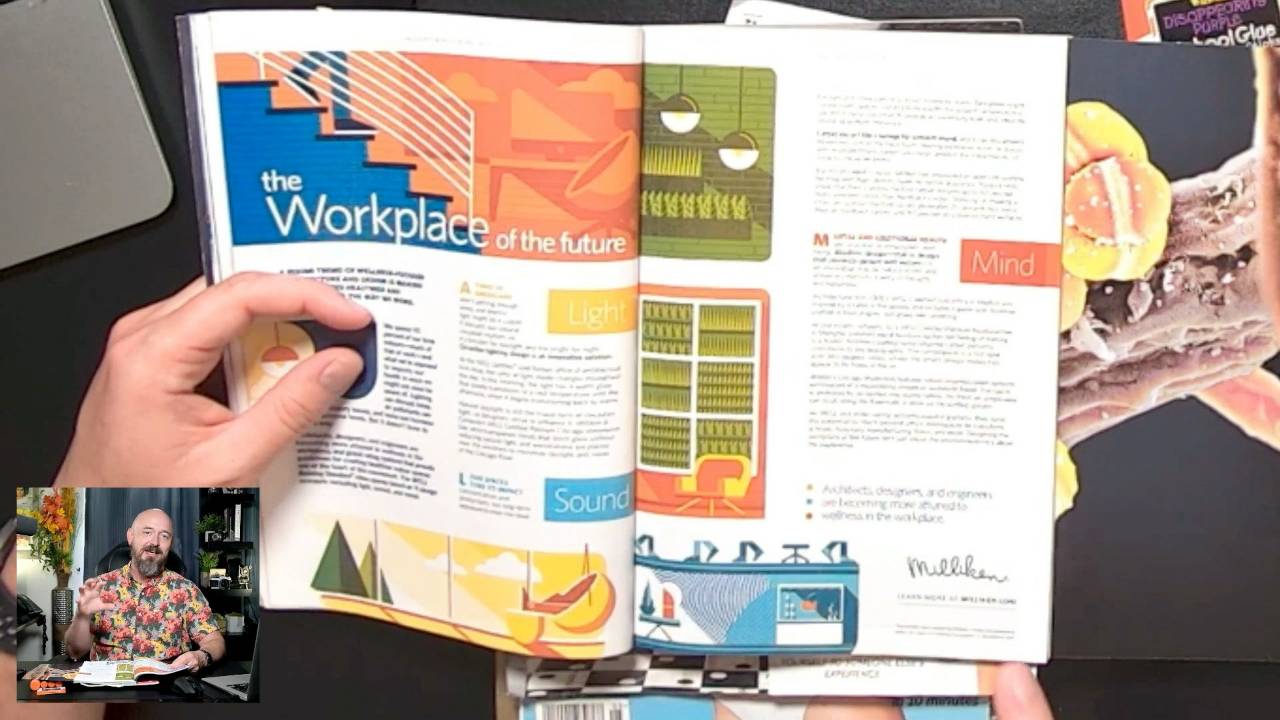
Learn how to properly photograph your collages using natural lighting, a flat angle, and simple setup tricks that ensure clean, usable images—whether you're using a DSLR or just your phone.
Module 5:
The Collage Workflow
Get an overview of the full project from start to finish. This module walks you through how each physical collage is turned into a Photoshop pattern and mapped to tonal zones in a reusable smart template.

Module 6:
Camera RAW File Preparation
If you photographed your collages in RAW format, this lesson shows how to import, crop, and prep those files in Adobe Camera RAW—adjusting tone, contrast, and exposure for consistency.
Module 7:
JPEG File Preparation
For JPEG or phone captures, this lesson teaches you how to clean up, correct, and match tonal values using tools like Perspective Crop, Curves, and masks—so every collage is pattern-ready.
Module 8:
From Collage to Pattern
Your first collage becomes a seamless Photoshop pattern. You’ll learn masking, cleanup, tiling, and pattern definition—all while preserving the handmade feel of your original paper textures.
Module 9:
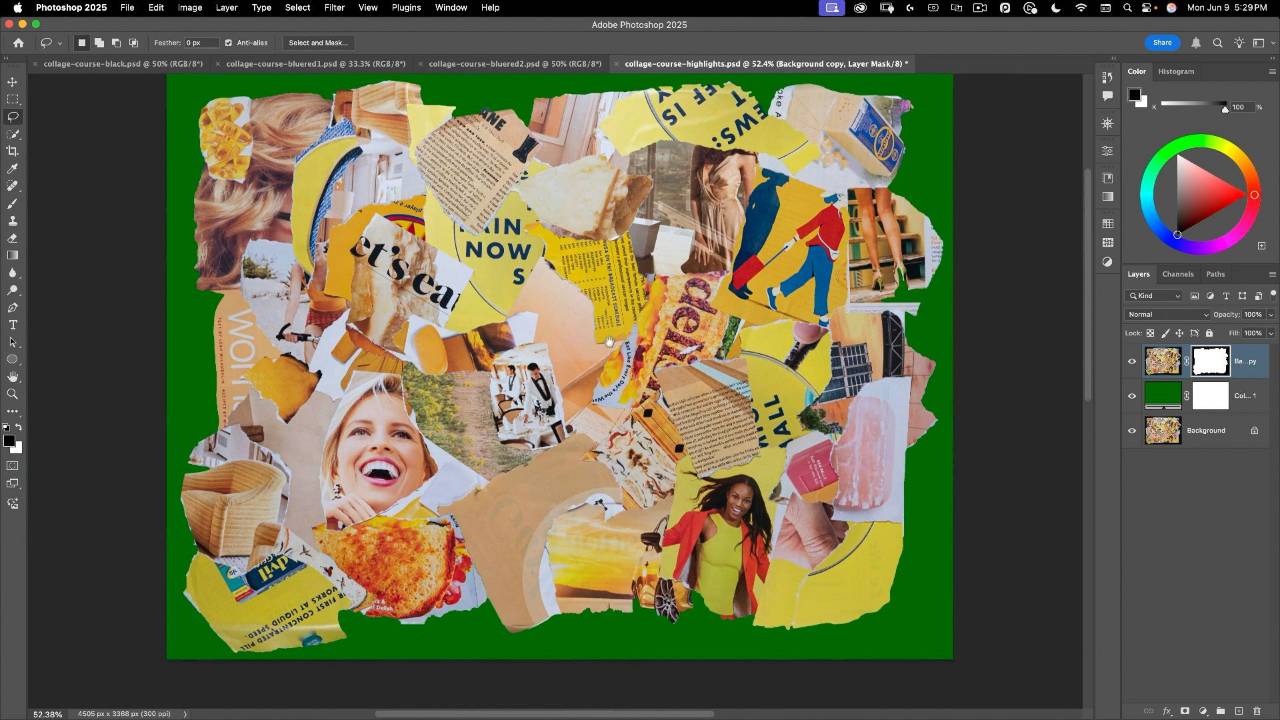
The Yellow Collage
Create your highlight pattern using a light-toned collage. Learn how to use reference brightness layers, grayscale matching, and tonal balancing to ensure your textures fit perfectly into the overall composite.
Module 10: Blue and Red Collages (Part 1)
Apply the pattern workflow to a two-tone collage and explore new tools—like Hue adjustments and Gradient Maps—to unify your palette while generating multiple color and grayscale variations.
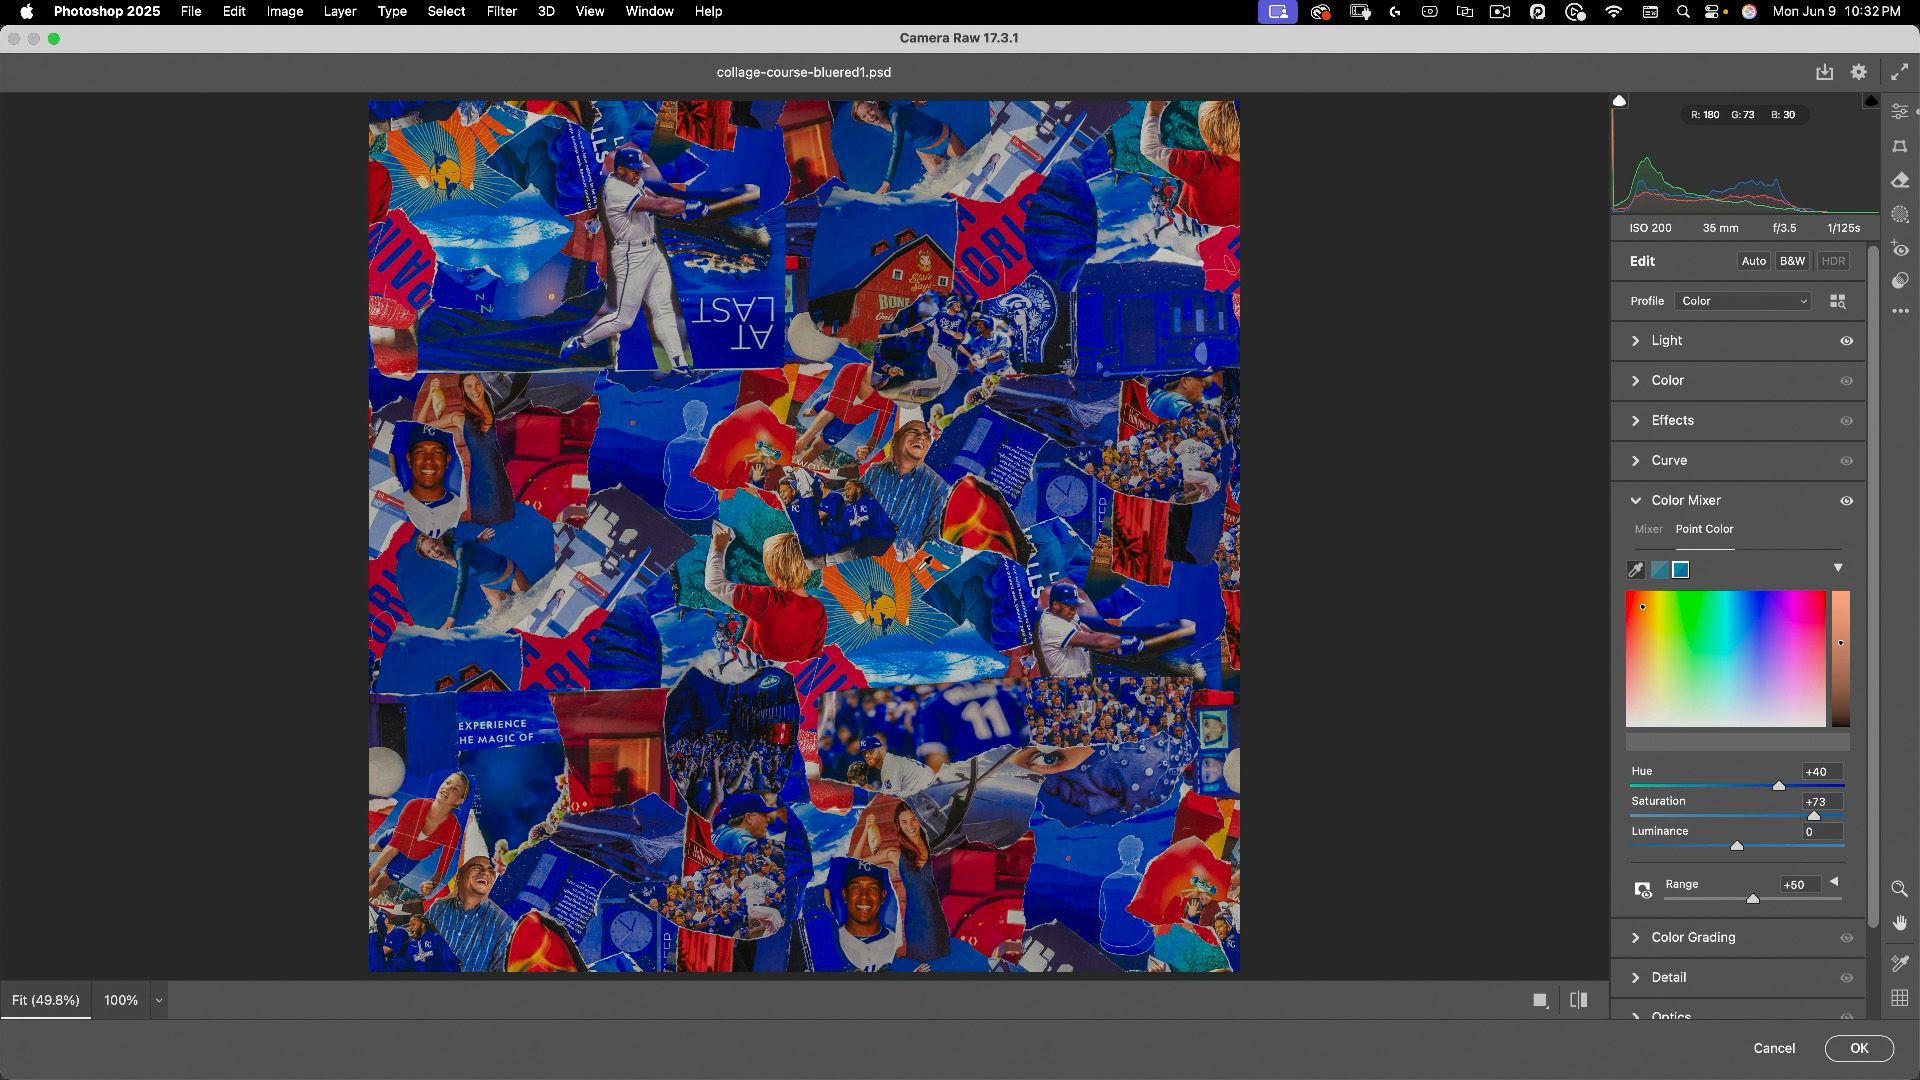
Module 11: Blue and Red Collages (Part 2)
Refine your masking and color control using Quick Mask, Magic Wand, and Camera RAW's Point Color. You’ll build a second seamless pattern from your collage, fully prepped for stylized compositing.
Module 12:
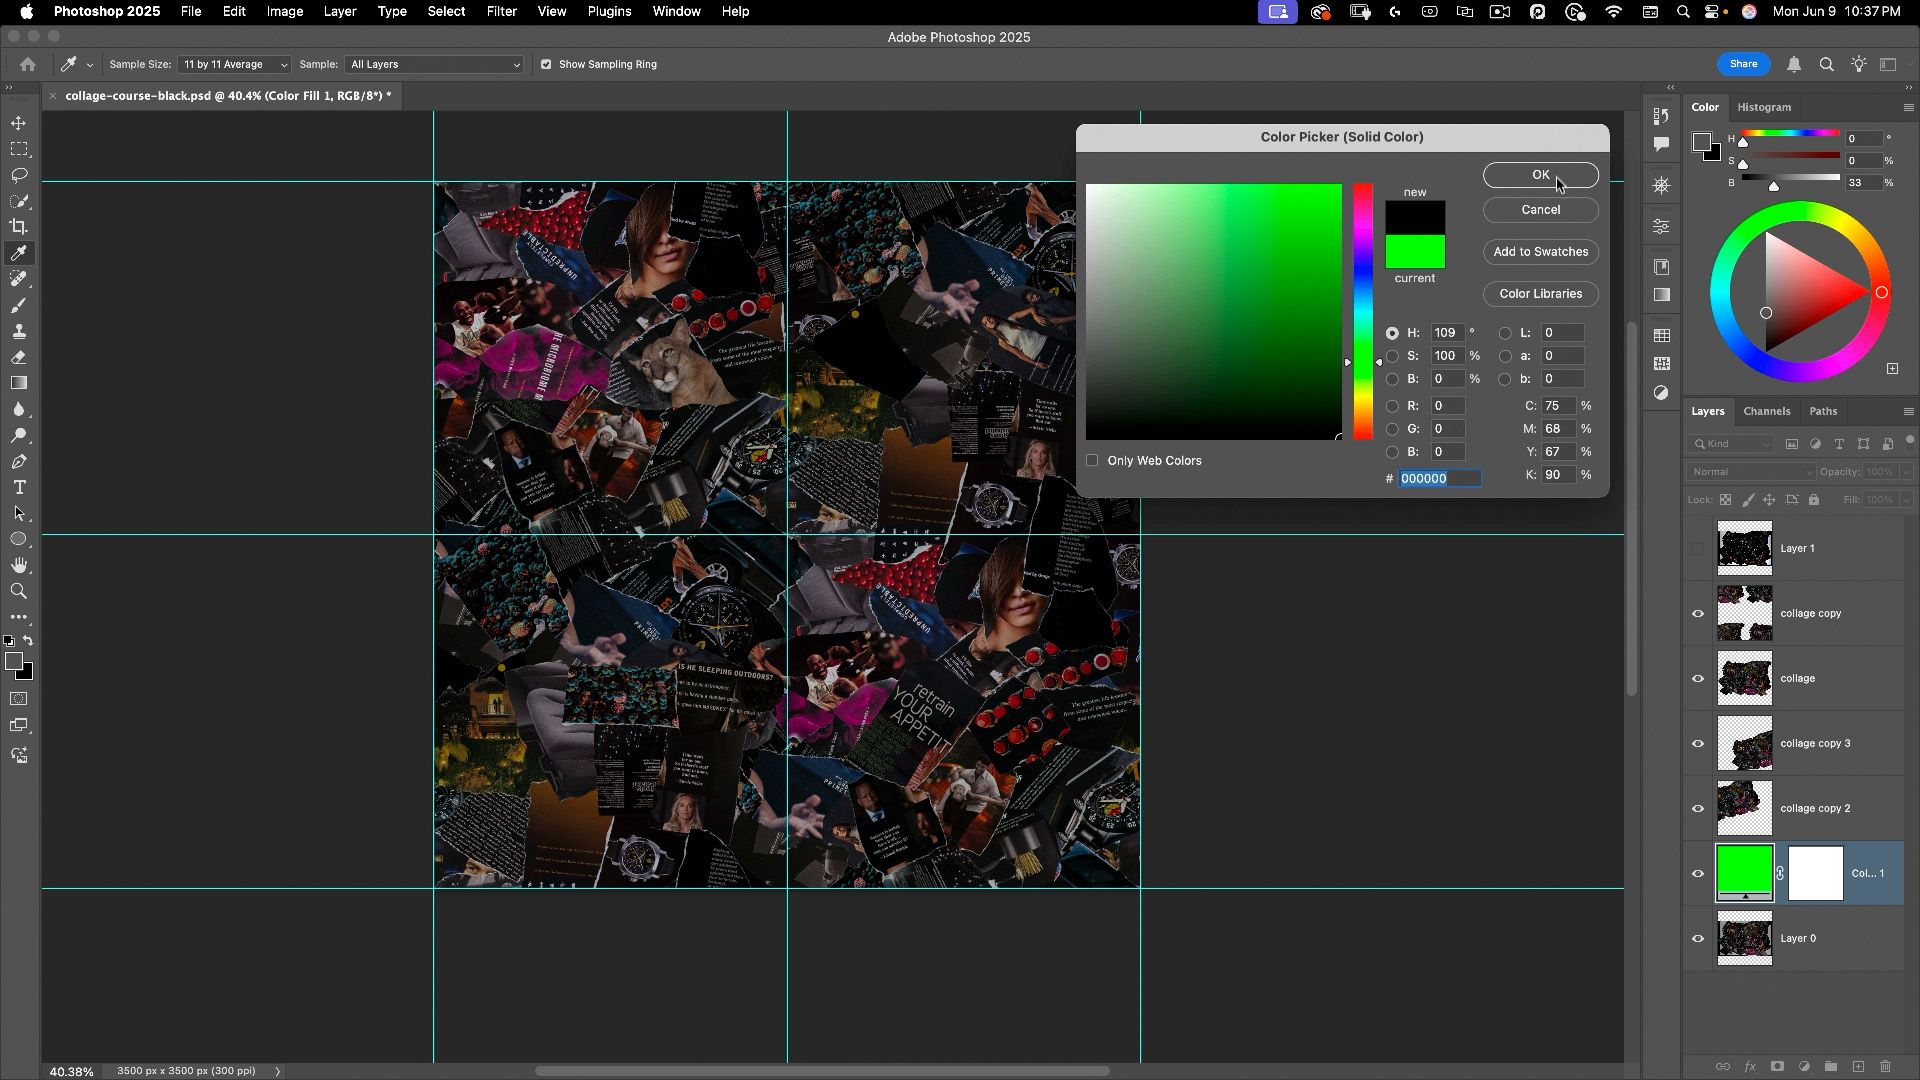
Black Collage
Build your darkest pattern using advanced masking and tonal isolation techniques. This module also covers organizing and backing up your completed collage patterns for easy use in your final project.

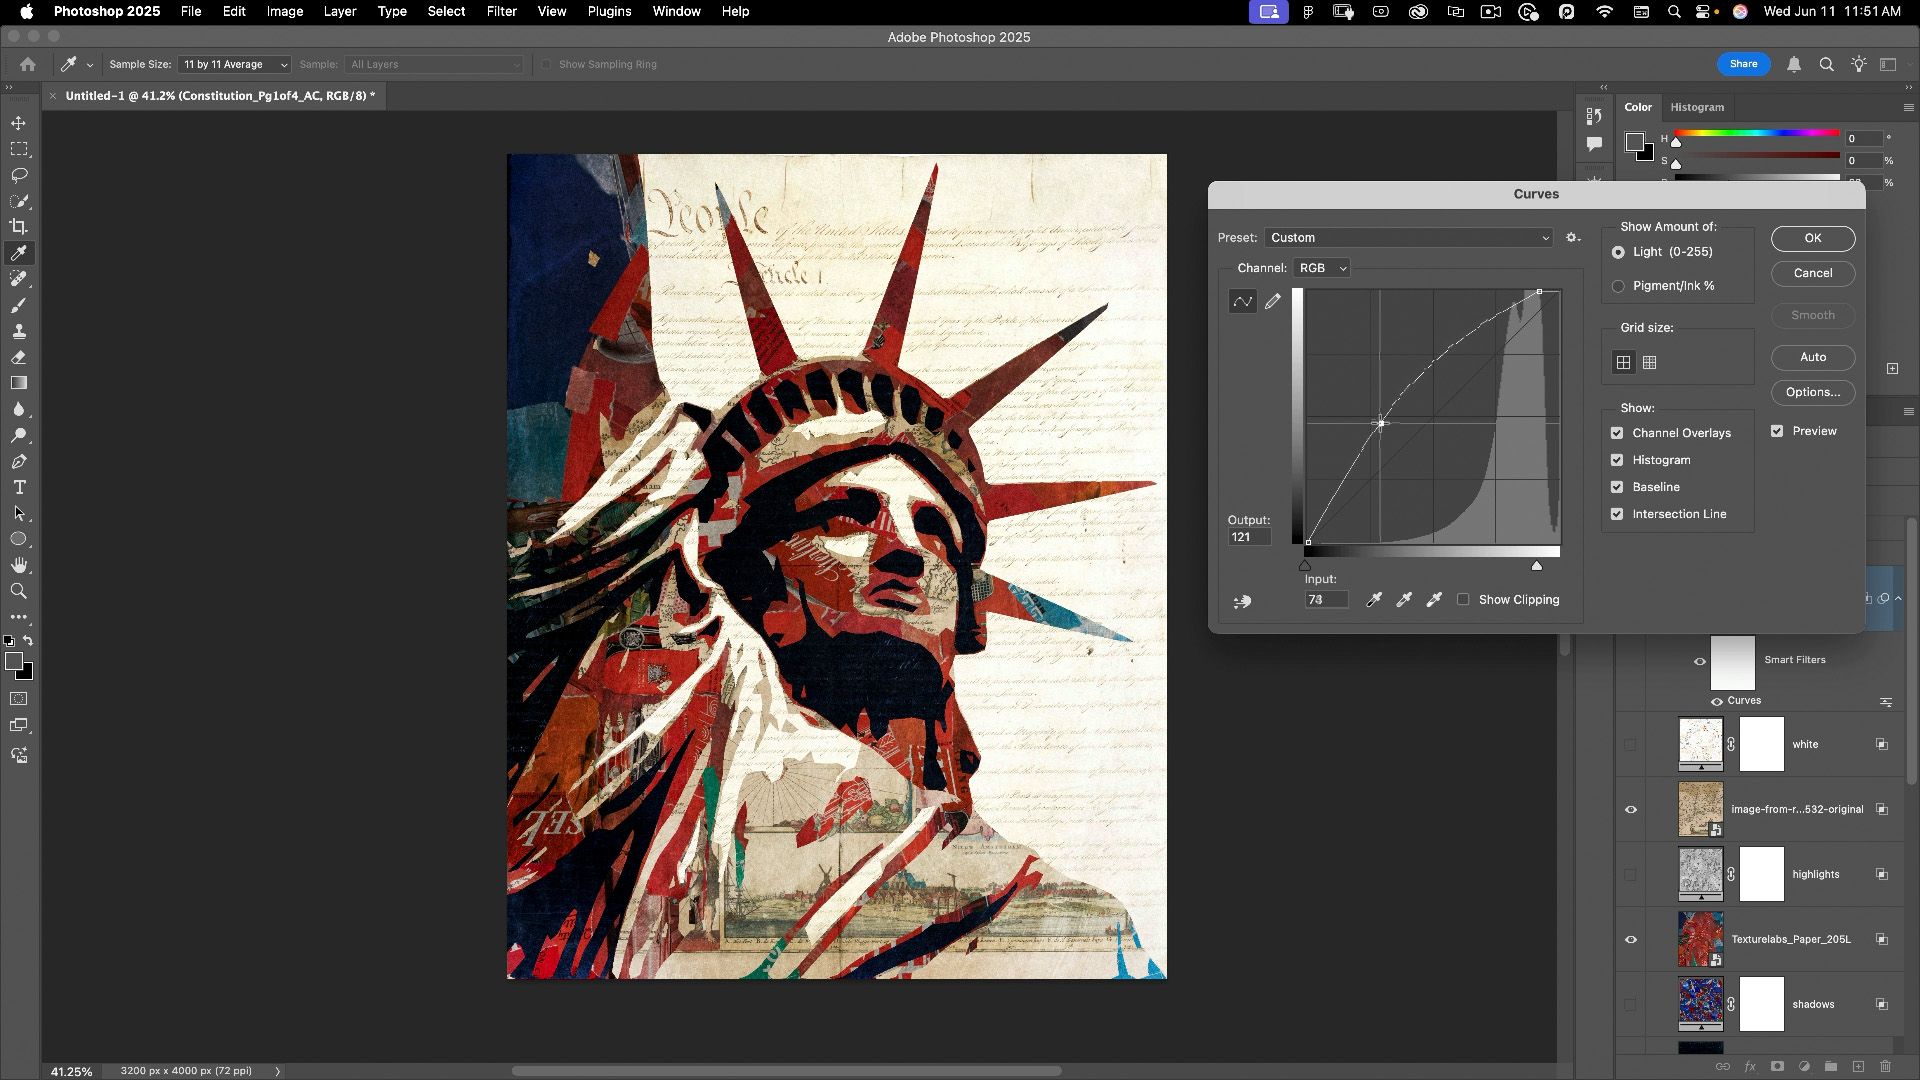
Module 13: The Collage Project (Part 1)
Begin creating your reusable Photoshop template. Convert your photo into a stylized, posterized version with four tonal zones, and assign each one a placeholder color using Gradient Maps.

Module 14: The Collage Project (Part 2)
Bring your patterns into the template and map each to the appropriate tonal zone using Blend If and channels. You’ll fine-tune scale, texture placement, and realism with overlays and adjustment layers.
Module 15:
Variety in Texture
Explore how to remix your collage using entirely new textures—vintage documents, maps, even resources from TextureLabs. Learn how to invert, recolor, and integrate them seamlessly into your template.
Module 16: Levers of Control (Part 1)
With the system in place, this module shows you how to make creative adjustments—like scaling textures, swapping tonal layers, and evaluating image contrast—to customize your composite's look and feel.
Module 17: Levers of Control (Part 2)
Dial in color grading, localized contrast, and visual mood. Learn how to use Curves, selective masking, and even subtle overlays to polish and personalize your finished collage image.

Module 18: Conclusion & Creative Challenge
Wrap up your project with a final message on creativity and expression. You’ll be encouraged to share your finished work in the Nucly Academy or Facebook group, and reflect on the value of making something entirely your own.
Follow Us

